How to Use
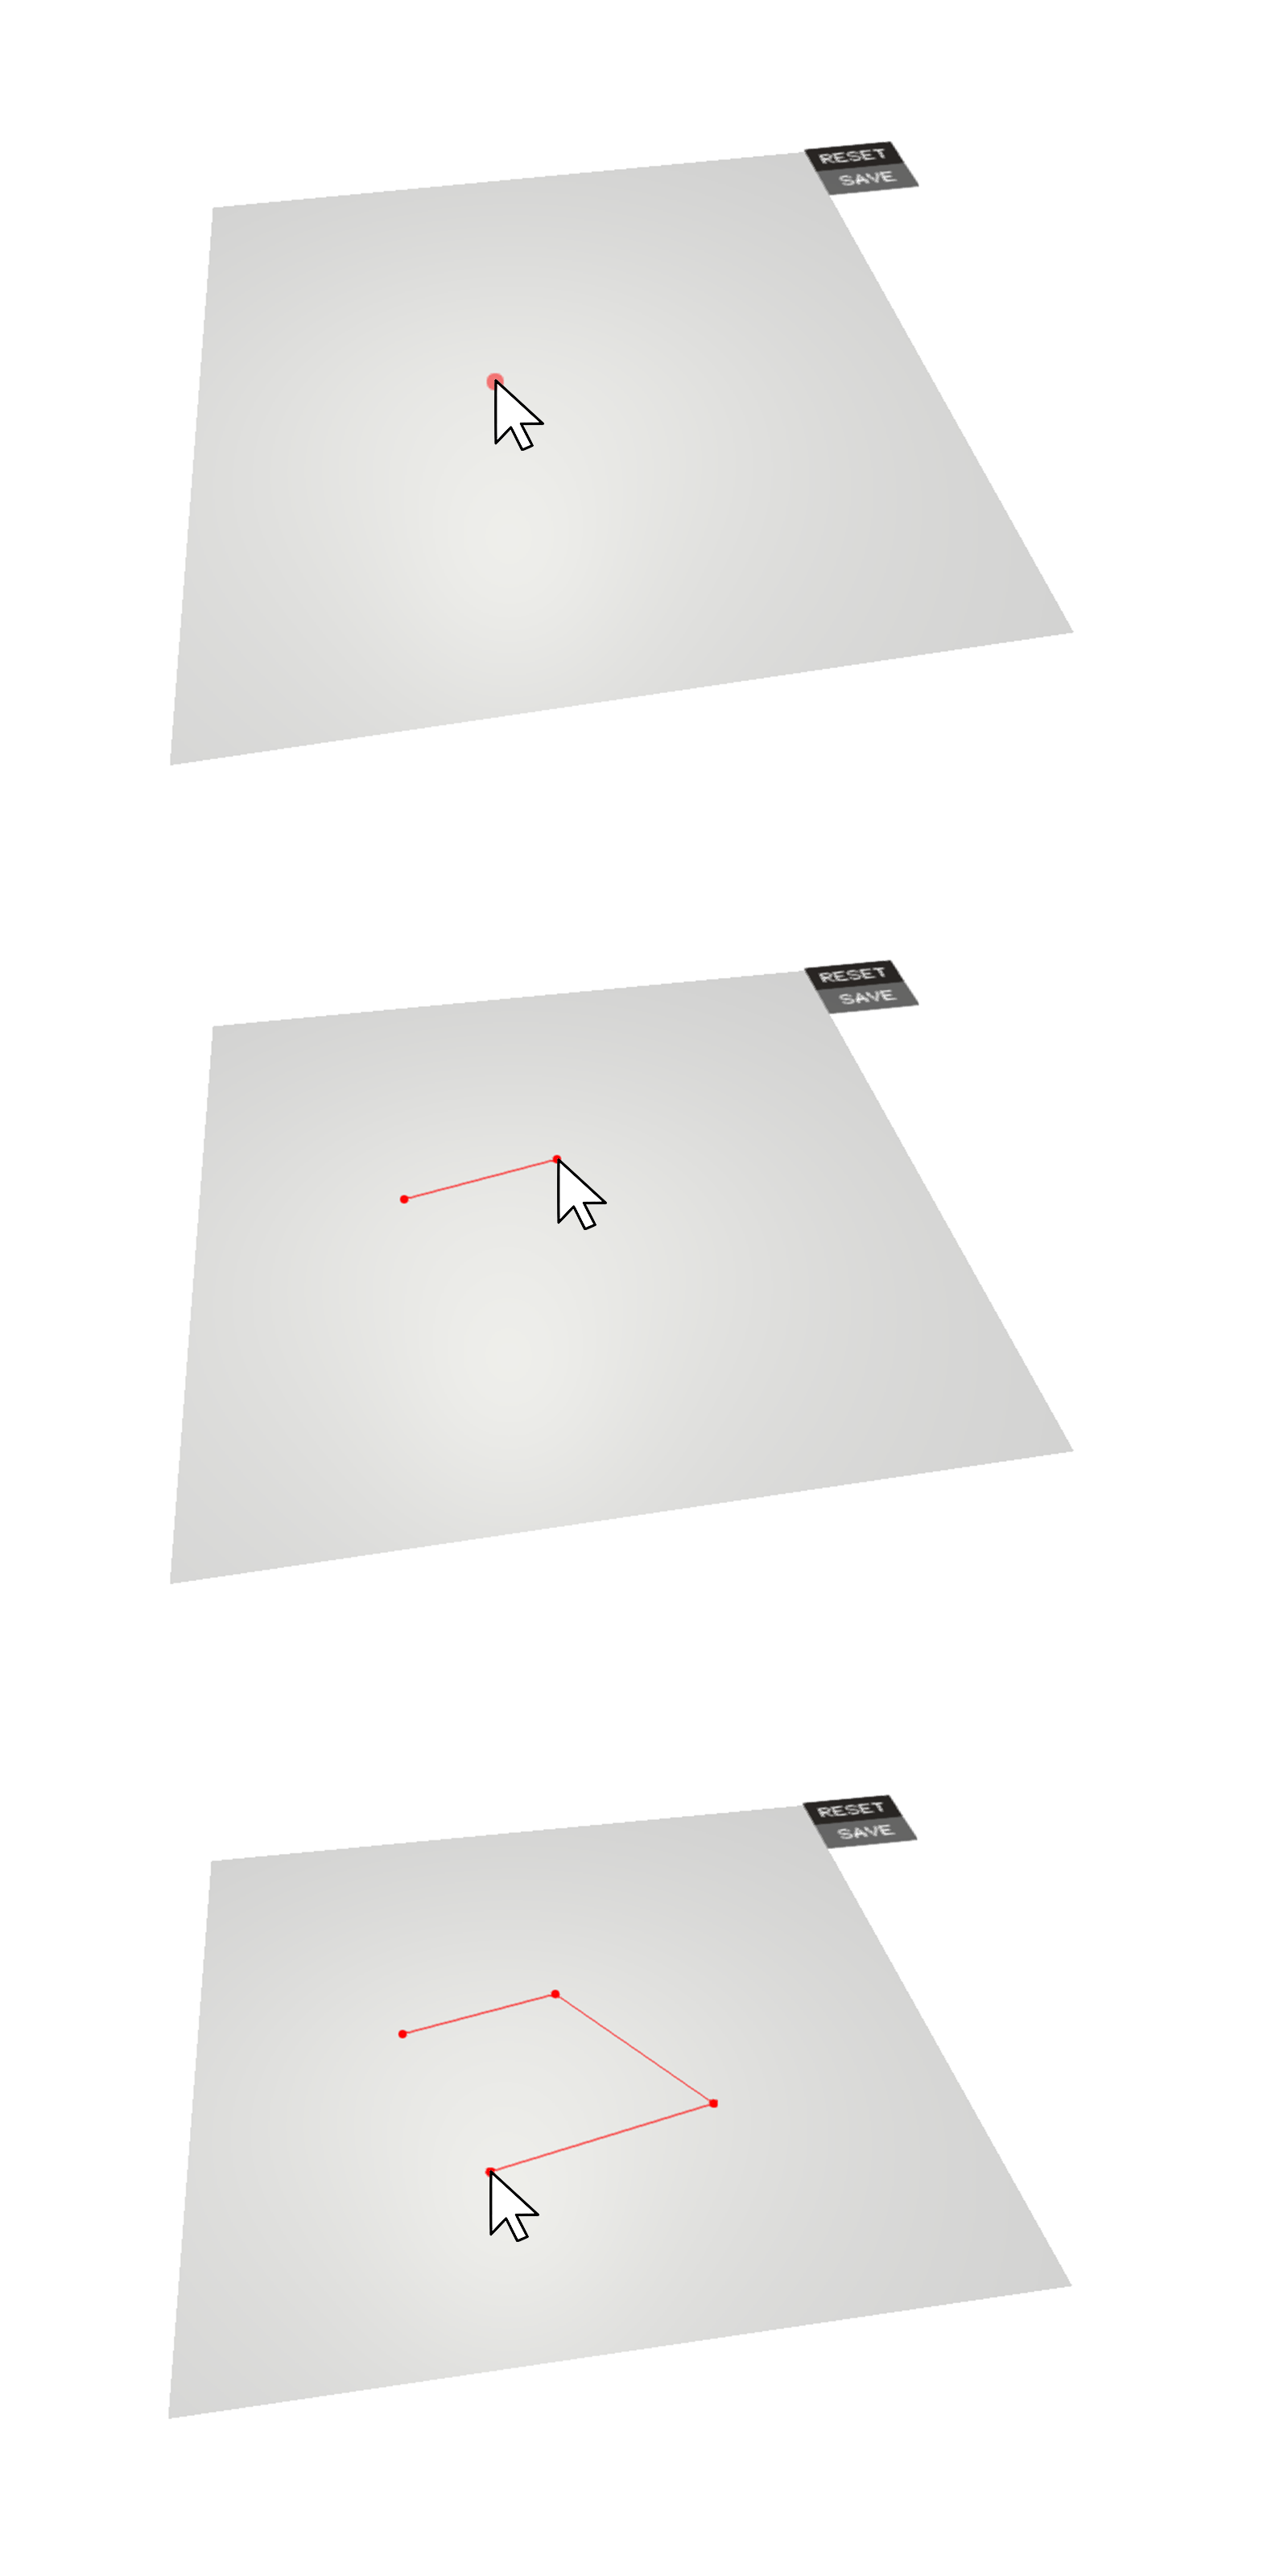
Getting Started
Double click anywhere on the ground plane to spawn a control point.
You can adjust the position of all the control points you created by clicking them once to pick them up,
and click once again to relocate the control point to your mouse position on the plane.
Double click again to create a line between the control points. This represents the border in which your city is created.
You can always move your controlpoints around by clicking them
You can repeat this process until your satisfied with your border, but keep it relatively simple for the best results.
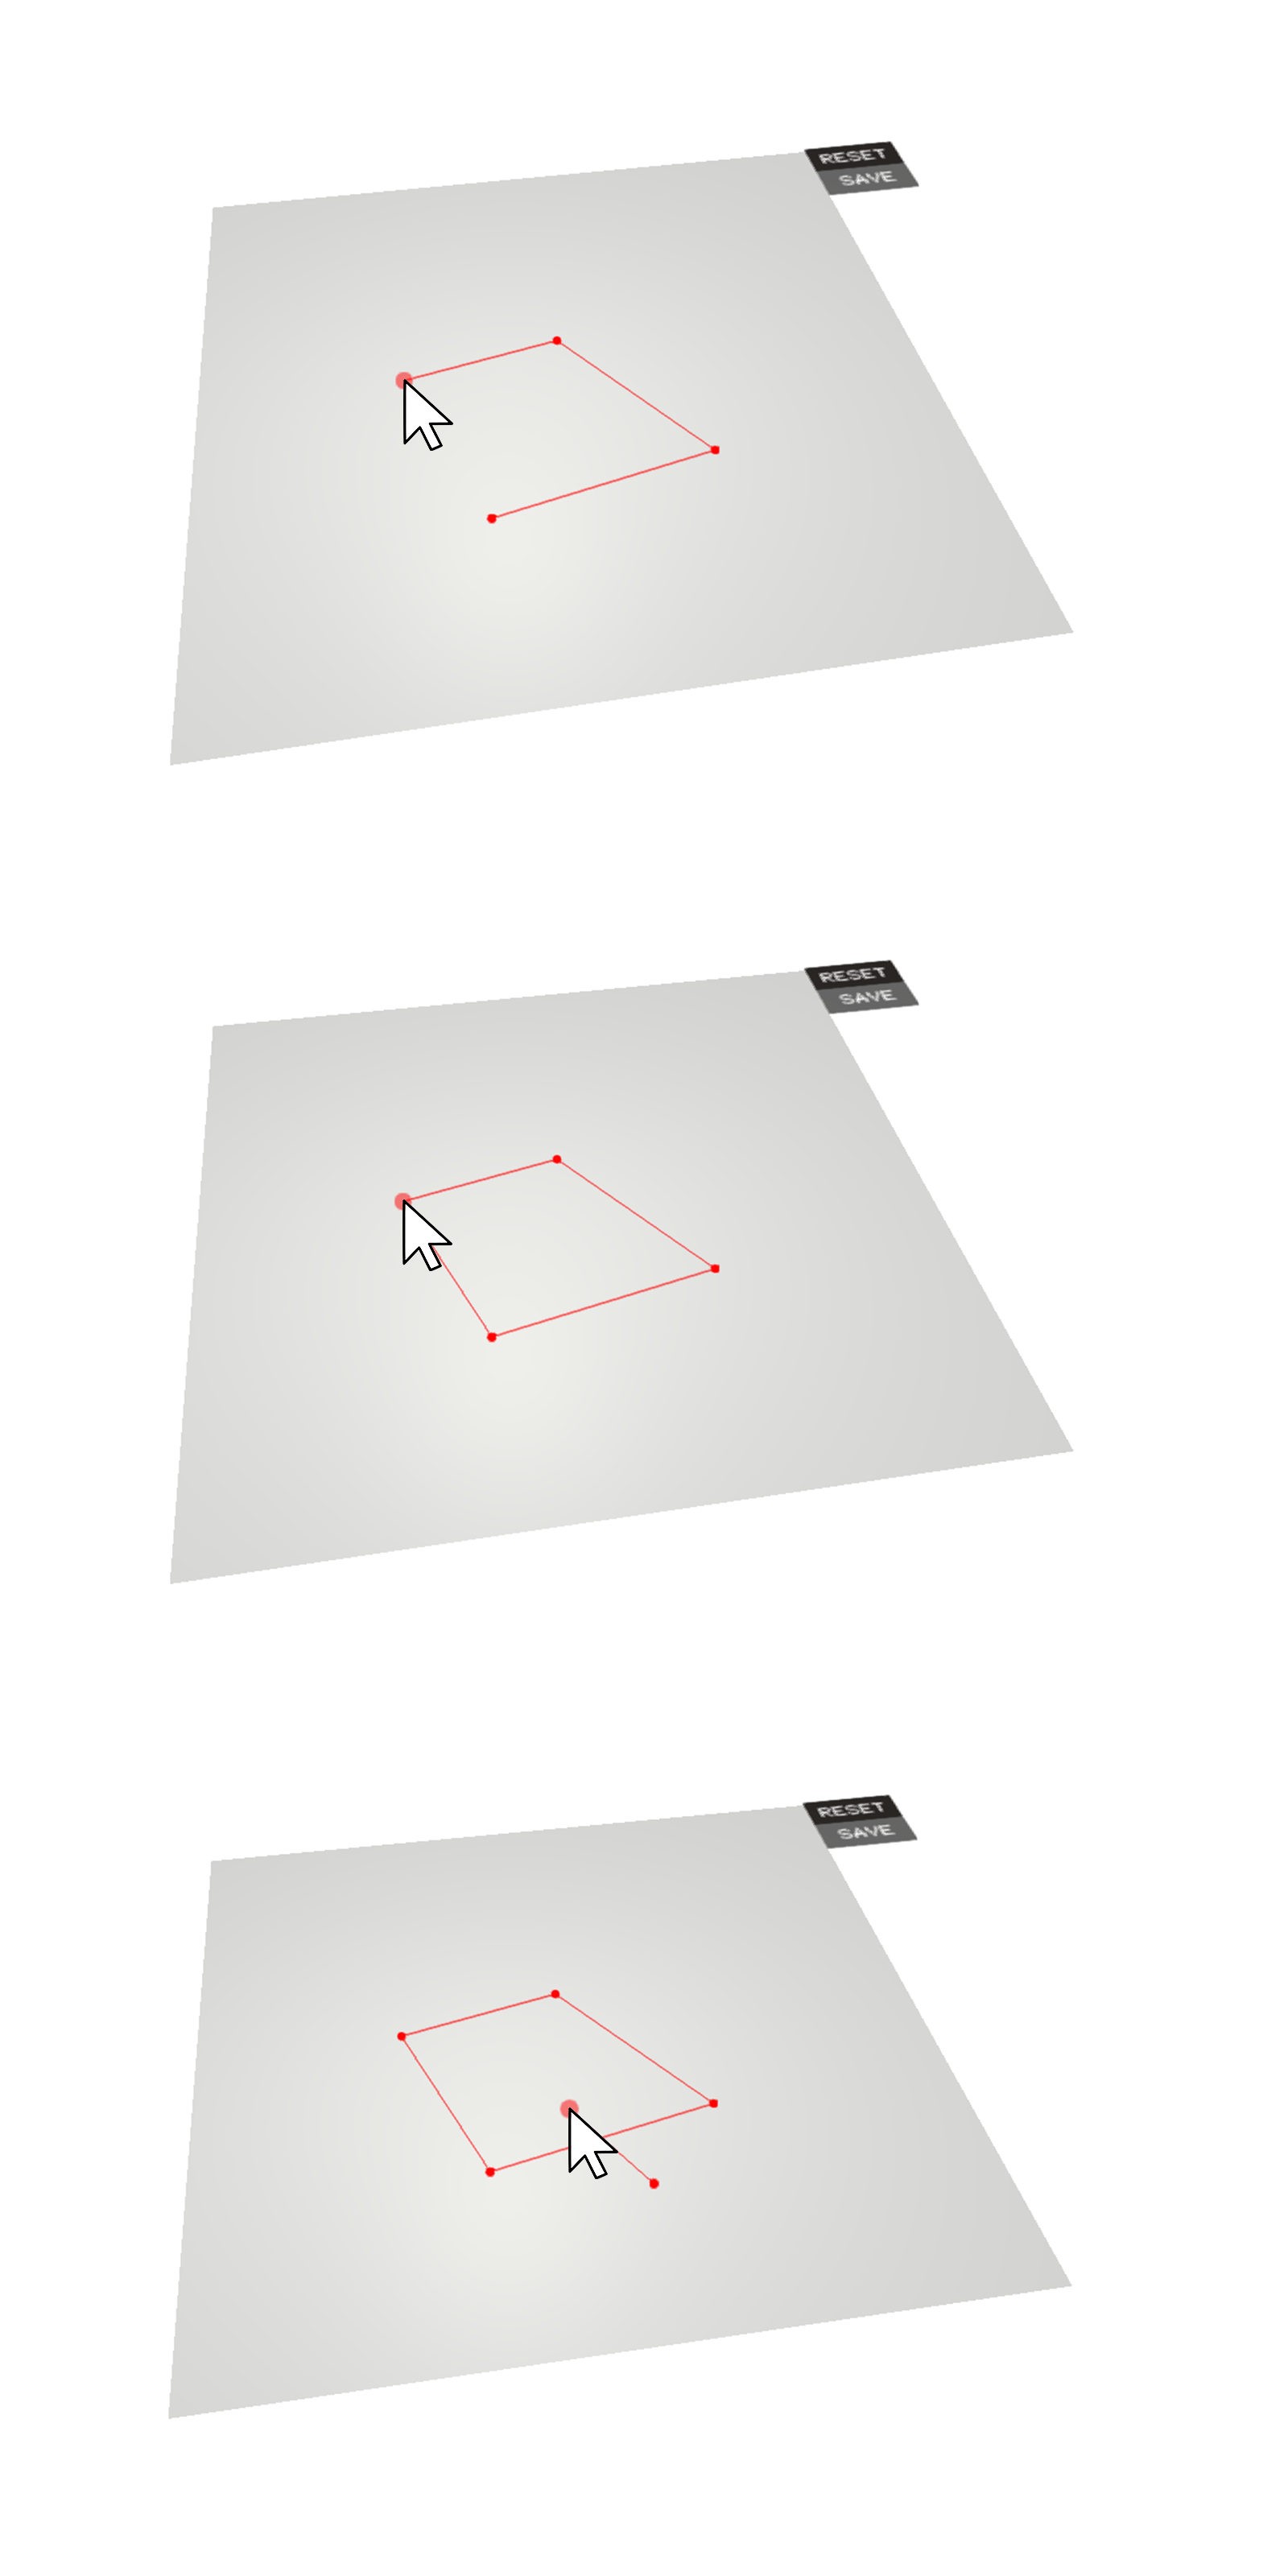
When you`re satisfied with the boundary you created, double click on a previously created control point.
Now your Boundary is closed, and you can start to draw lines, that represent roads leading into your planning area.
Now your double click creates the first point of an input road.
Double click again to create the second point of your input road.
You can repeat this process until your satisfied with your Input Roads.
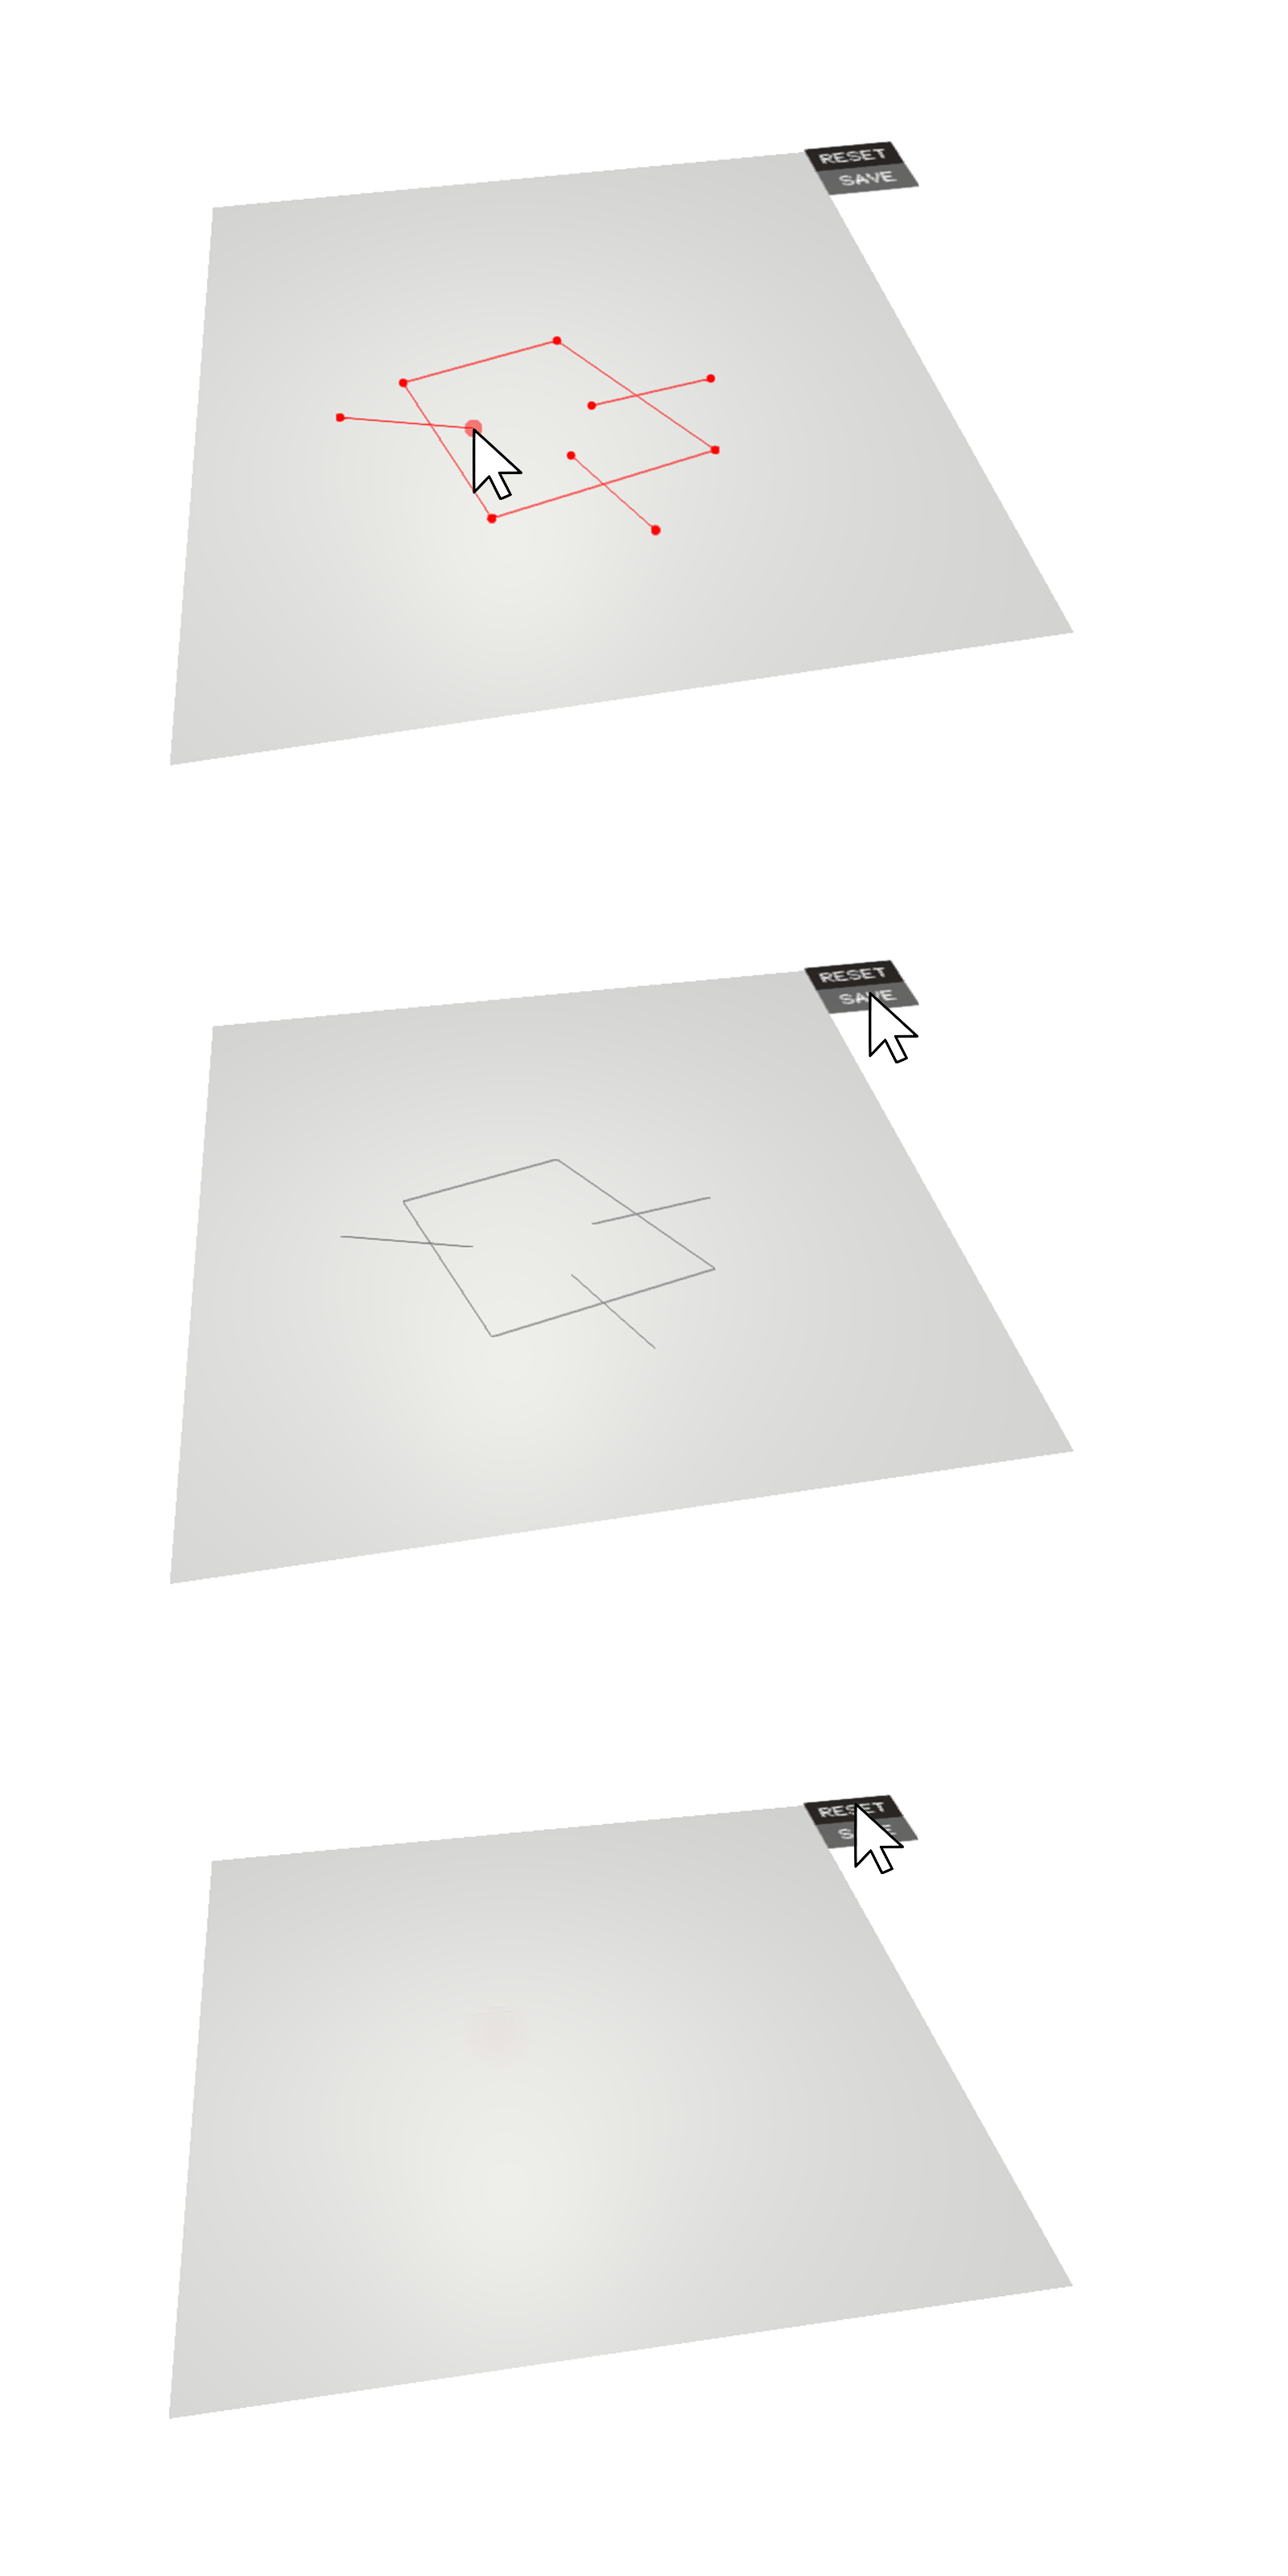
When you`re done with the boundary and the rnput roads it should look something like this.
As mentioned before, you can still adjust the positions of all your control points
Now you can save your Input by double clicking the save button at the top right corner of the ground plane.
Double click the Reset button to clear all Input and retry.
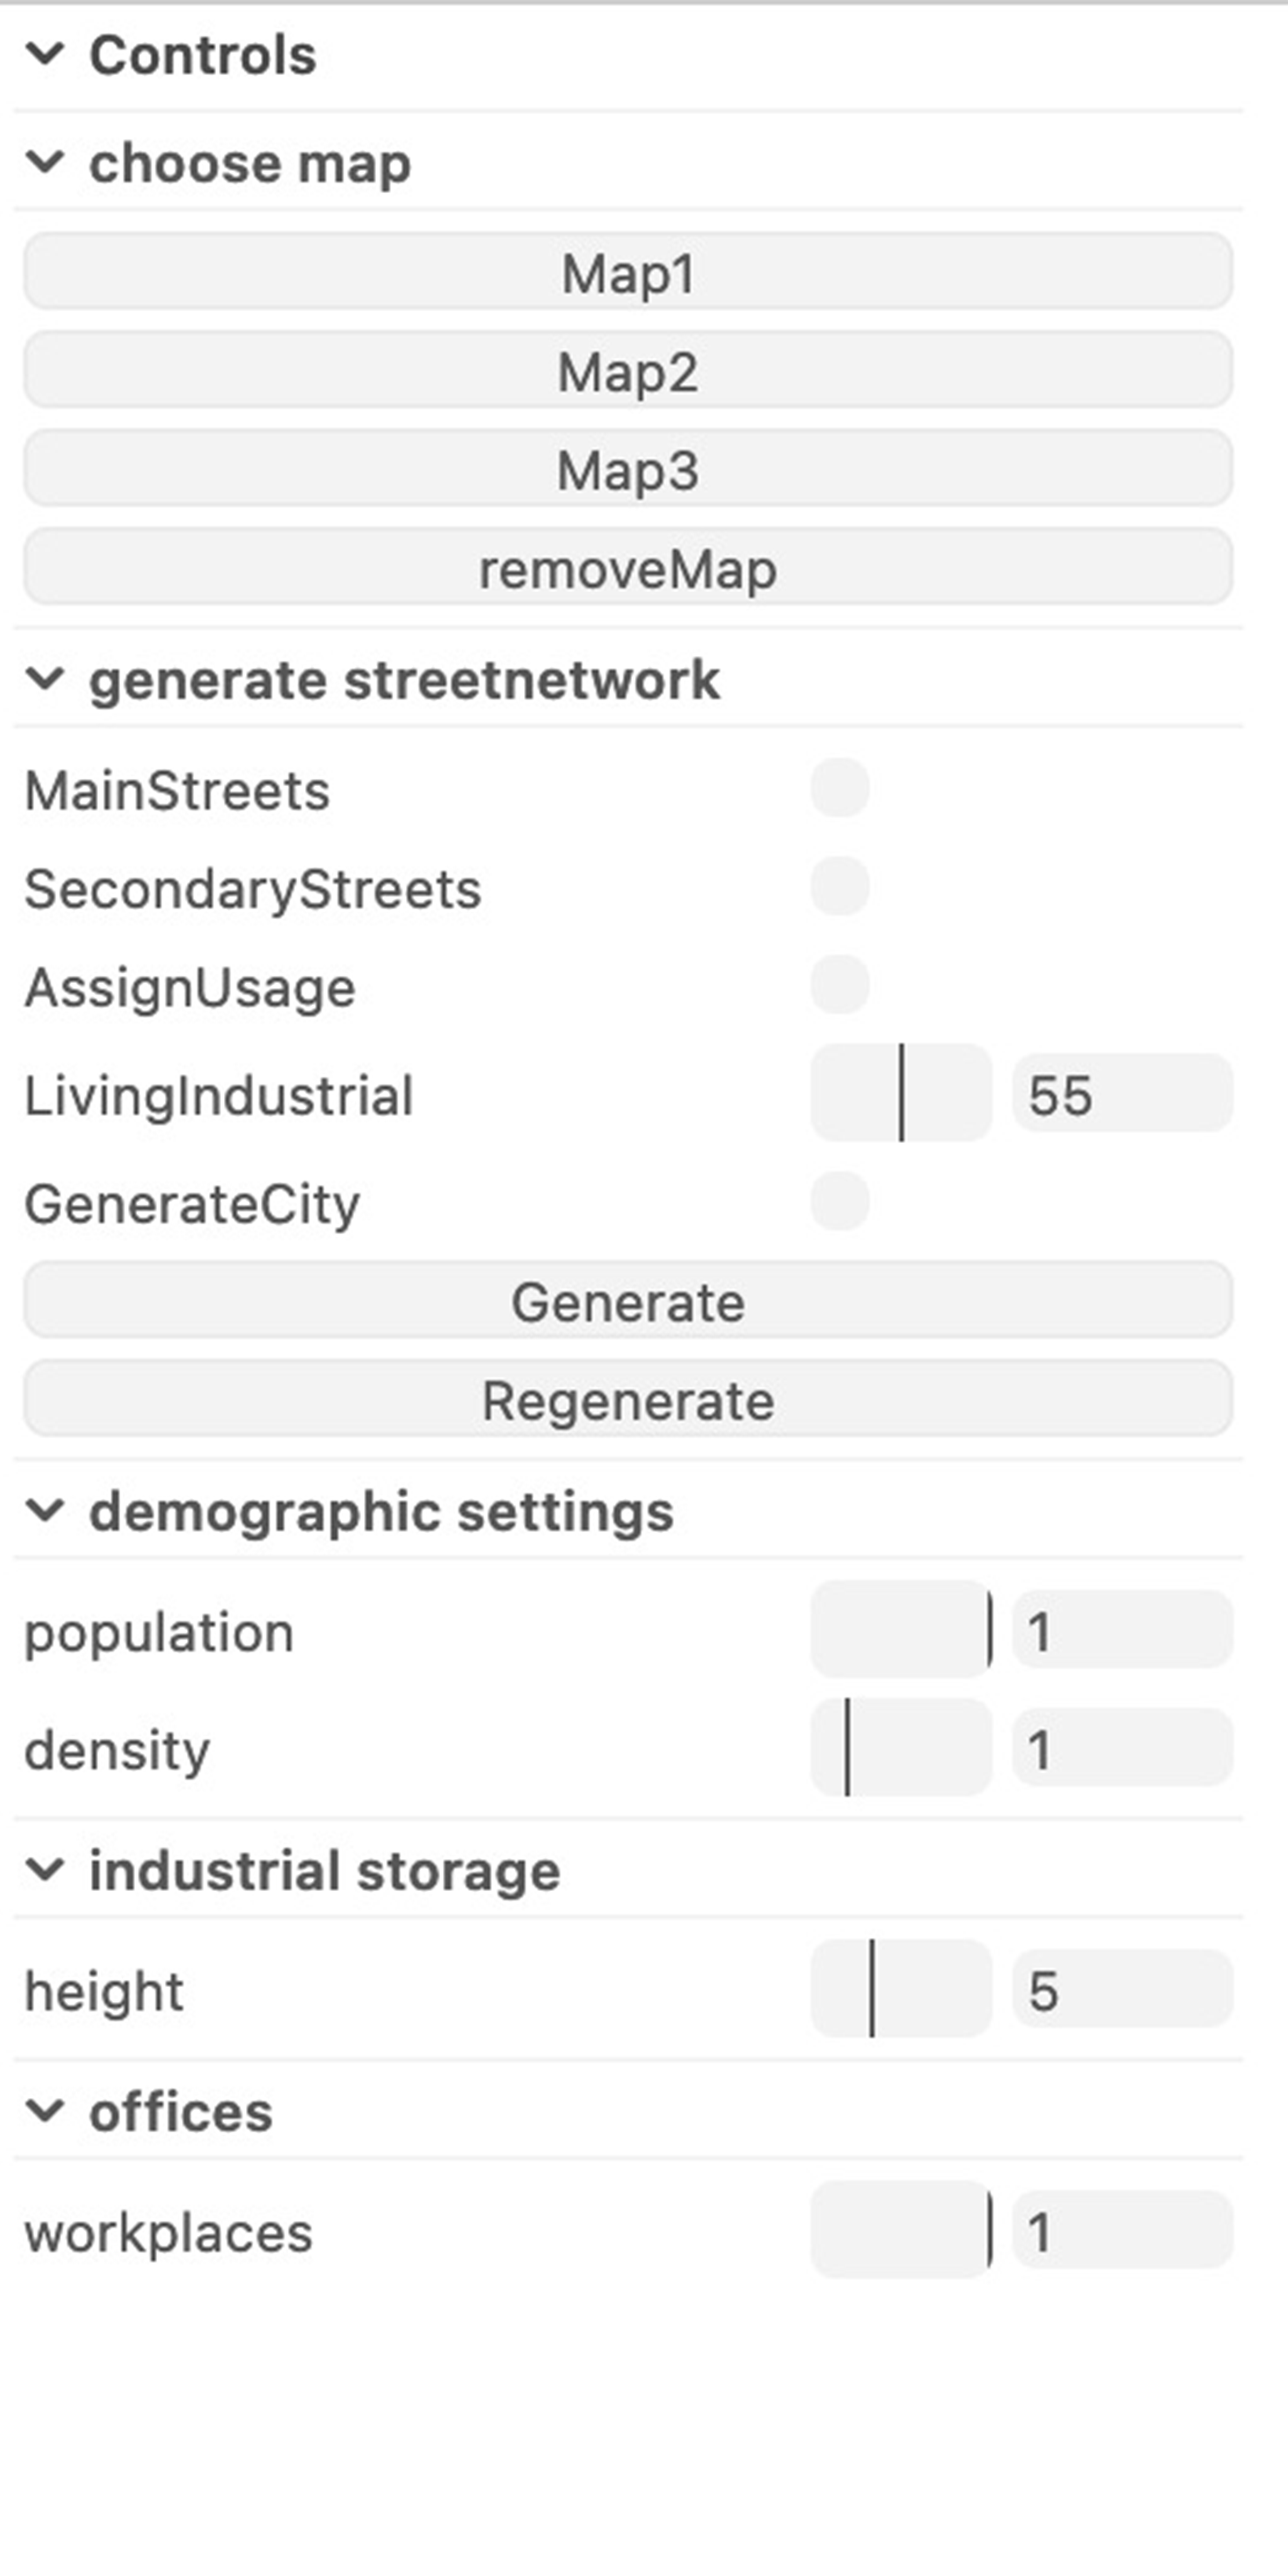
Parameters and User-Interface
choose Map
In the choose Map menu you can enable and disable one of 3 pre-defined maps from around Germany. This optional map is put as a base plane for you to draw on to have a reference in size and to be able to compare with a real, existing surrounding area
generate step-by-step
After you drew up the area boundary and optionally the main street lines, you can have a step-by-step insigh tas to how the final city is generated with the following steps:
The first step is to enable "MainStreets" to generate the primary Streets out of your drawn main street lines and click on "Generate".
Enabling "SecondaryStreets" divides the area you drew according to the already generated primary streets into smaller plots after you click on "Generate" again.
The next step is to determine the usage case for each of small, newly generated plots. to visualize this, simply enable "AssignUsage" and press "Generate".
You can predetermine the general structure of your city by changing the "LivingIndustrial" slider. This options allows you to set the focus on either a living space orianted area or a more industrial optimized area, thereby changing the occurrence of civil and industrial infrastructure.
To finalize your city design, enable the "GenerateCity" option. This automatically puts buildings on the plots that vary in structure and size based on its usage.
If you forgot to enable any of the options above or enabled them in the wrong order, its not a problem. An automatically generated solution will be used, thereby not impacting the result you see.
The "Regenerate" option is always available for you. No matter if you want to skip past any steps explained earlier, if you want to alter the structure of the small plots in your area or if you want to randomly generate other versions of the finished city. The "Regenerate" option generally just creates a new city for you from any point.
demographic settings
The "population" slider determines the amount of people that have to be accounted for with the maximum available area for living spaces. Changing this value adds or removes buildings and changes plots.
The "density" slider changes the space that each person needs in the earlier defined available area. Depending on the value it is set to, this option only changes the general height and topography of the buildings assigned for living usage, not the amount of buildings.
industrial storage
By changing this value with the "Height" slider, the per-floor height of the buildings assigned for industrial usage is increased or decreased. This also changes the general height of those buildings, as the number of floors will stay at the same amount.
offices
For office buildings, the slider "Workplaces" increases or decreases the amount of workers a building needs to account for. This changes the amount of floors depending on the value you choose.